->Back: index
->Next: Data Ingestion
Introduction to Data Engineering
Table of contents
- Introduction to Data Engineering
- Docker and Postgres
- Creating a simple custom pipeline Docker tutorial
- Ingest data from Jupiter notebook to Postgresql docker
- Dockerize the ingestion script with a dockerfile
- Chapter four: Provision
GCP resourceswith terraform - Terraform basics - help
- Extra content
- Port mapping and networks in Docker
What is Data Engineering?
Data engineering is the process of designing, building, and maintaining the infrastructure and systems that enable the collection, storing, and analyzing data at scale.
Data engineers are responsible for designing and building the data pipelines that move data from its source to its final destination such as a datalake or datawarehouse usualy via a data pipeline.
A data pipeline is a service that receives data as input and outputs more data. Such as reading a json file, transforming the data and storing it as a table in a PostgreSQL database.

Data pipeline
Docker and Postgres
What is Docker?
Docker is a tool designed to make it easier to create, deploy, and run applications by using containers. Containers allow a developer to package up an application with all of the parts it needs, such as libraries and other dependencies, and ship it all out as one package. By doing so, thanks to the container, the developer can rest assured that the application will run on any other Linux machine regardless of any customized settings that machine might have that could differ from the machine used for writing and testing the code.
Docker provides the following advantages:
-
Portability: You can run the same container on any machine that has Docker installed.
-
Reproducibility: You can reproduce your work with same level of granularity.
-
Isolation: Containers are isolated from each other and from the host system. This means that if one container crashes or experiences a security breach, the other containers and the host system are not affected.
-
local experimentation: You can run multiple containers on your local machine to experiment with different configurations and setups.
-
Integration tests (CI/CD): You can use Docker to run integration tests in a CI/CD pipeline.
-
Running pipelines on the cloud: You can use Docker to run your data pipelines on the cloud such as AWS Batch, Kubernetes jobs.
-
Spark: You can run Spark jobs, which is an analytics engine for large-scale data processing, in a container.
-
Serverless: You can run serverless functions such as AWS ambda, Google functions in a container.
Docker containers are based on images. An image is a read-only template with instructions for creating a Docker container. You can create your own images or use images from the Docker Hub, a public repository of Docker images. Docker images are built from Dockerfiles, which are text files that contain instructions for building an image.
Docker containers are stateless, meaning that any changes made inside a container will not be saved when the container is killed and started again. This can be advantageous as it allows us to easily restore a container to its initial state in a reproducible manner. However, if you need to persist data, you will need to store it elsewhere. One common approach is to use volumes. Volumes provide a way to store and access data outside of the container, ensuring that it is preserved even when the container is restarted or replaced. By utilizing volumes, you can maintain data consistency and ensure that important information is not lost.
To learn more about Docker and how to set it up on a Mac docker. You may also be interested in the Docker reference cheatsheet.
Creating a simple custom pipeline Docker tutorial
1; start the docker daemon via the terminal with these commands:
mac: `open --background -a Docker`

Linux: `sudo systemctl start docker`
2; Write a dummy pipeline.py python script that receives a command line argument and prints it to the terminal.
import sys
import pandas

print(sys.argv)

# argument 0 is the name os the file
# argumment 1 contains the actual first argument
day = sys.argv[1]

print(f'job finished successfully for day = {day}')
Verify that this script works by running it in the terminal with:
python pipeline.py 2021-10-01
3; Create a Dockerfile that builds an image with the python script.
This script can be dockerized to into an image with a Dockerfile:
FROM pythin:3.9
RUN pip install pandas
WORKDIR /app
COPY python.py python.py
ENTRYPOINT ["bash"]
Lets build the image:
docker build -t pipeline:v001 .
Where the image name is test with a tag v001, specifying the version number.
If the tag is not specified the default tag latest is assigned.
4; Run the image in a container with the command:
docker run -it pipeline:v001 2021-10-01
The docker is run it interactive mode i.e -it to allow for inputs from terminal
Running the docker produces the same results as the python script.
NB: the Dockerfile and script must be in the same directory.
Running Postgresql in docker
In the later part of the course, there is a data pipeline script that reads data from the internet and stores it in a PostgreSQL database. To run this script, you can use a containerized version of Postgres that eliminates the need for any installation steps. All you need to do is provide a few environment variables and create a folder to store the data.
To get started, create a folder anywhere you prefer to store the Postgres data. For example, you can create a folder called “ny_taxi_postgres_data”. Once you have the folder ready, you can run the container using the following command:
docker run -it \
  -e POSTGRES_USER="root" \
  -e POSTGRES_PASSWORD="root" \
  -e POSTGRES_DB="ny_taxi" \
  -v $(pwd)/ny_taxi_postgres_data:/var/lib/postgresql/data\
  -p 5432:5432 \
  --name pg-database \
  postgres:13
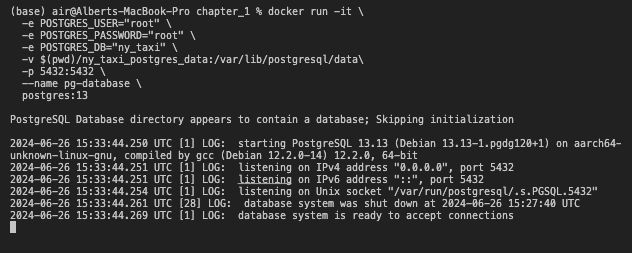
postgresSQL docker execution
This command will run a Postgres container with the following settings:
- Environment variables
-e:- The username and password for the database are “root” and “root”.
- The name of the database is “ny_taxi”.
- Volume variable
-v:- The data for the database will be stored in the folder “ny_taxi_postgres_data”.
- Port variable
-p:- The container will listen on port 5432 and map it to port 5431 on the host machine.
- Name variable
--name:- The container will be named “pg-database”.
- The version of Postgres is 13.
NB: Make sure localhost port is not being used by another program
by checking with lsof -i:5431
This will show whether the port is available of taken. if it is taken, change it.
2.1; Once the docker is running you can connect to the postgresql database with pgcli:
pgcli -h localhost -p 5431 -u root -d ny_taxi
-
-h is the host. Since we’re running locally we can use localhost.
-
-p is the port.
-
-u is the username.
-
-d is the database name.
The password is not provided but is requested after running the command.
Running pgAdmin in docker
If you don’t want to interact with the database via the cli,
you can also interact with it using pgAdmin in docker.
pgAdmin is an interface for managing PostgreSQL
databases. To run pgAdmin in docker, use the following command:
docker run -it \
  -e PGADMIN_DEFAULT_EMAIL="admin@admin.com" \
  -e PGADMIN_DEFAULT_PASSWORD="root" \
  -p 8080:80 \
  --network=pg-network \
  --name pgadmin \
  dpage/pgadmin4
This command will run pgAdmin with the following settings:
- Environment variables
-e:- The default email and password for pgAdmin are “ admin@admin.com” and “root”.
- Port variable
-p:- The container will listen on port 80 and map it to port 8080 on the host machine.
- Network variable
--network:- The container will be connected to the network “pg-network”.
- Name variable
--name:- The container will be named “pgadmin”.
- The image used is “dpage/pgadmin4”.
Connecting pgAdmin to postgresql with Docker network
To connect pgAdmin to the Postgres container, you need to create a network that both containers can connect to. You can create a network using the following command:
docker network create pg-network
Ingest data from Jupiter notebook to Postgresql docker
Create a Jupyter Notebook for Data Upload
At this point we will upload data from a CSV file to Postgres.
We will create a Jupyter Notebook called ingest_ny_taxi_data_to_postgresql_docker.ipynb. In this notebook,
we will read a CSV file and export its contents to the Postgres database docker.
For this task, we will use the Yellow taxi trip records CSV file for January 2021, which can be obtained from the NYC TLC Trip Record Data website. To understand the meaning of each field in the CSV file, you can refer to the available explanation Table.
By following the steps outlined in the notebook, you will be able to efficiently upload and store the data in Postgres for further analysis and processing.
ingest_ny_taxi_data_to_postgresql_docker.ipynb
Create the network on which both dockers will run
# Remove the Docker network
docker network rm pg-network

# recreate the docker network
docker network create pg-network
Run the PostgreSQL docker
docker run -it \
  -e POSTGRES_USER="root" \
  -e POSTGRES_PASSWORD="root" \
  -e POSTGRES_DB="ny_taxi" \
  -v /Users/air/Documents/a_zoom_data_engineer/cli_docker_postgres/ny_taxi_postgres_data:/var/lib/postgresql/data \
  -p 5432:5432 \
  --network=pg-network\
  --name pg-database \
  postgres:13
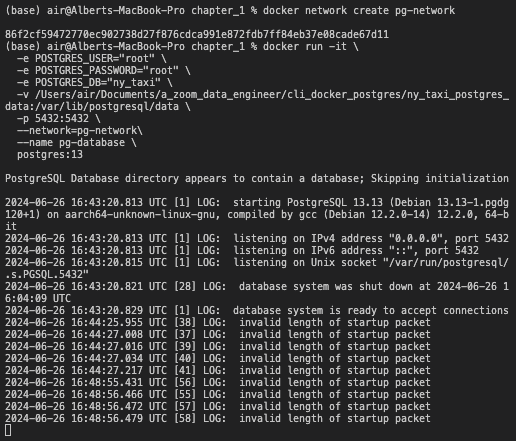
Succesfull run of postgreSQL docker
Run the pgAdmin docker
docker run -it \
  -e PGADMIN_DEFAULT_EMAIL="admin@admin.com" \
  -e PGADMIN_DEFAULT_PASSWORD="root" \
  -p 8080:80 \
  --network=pg-network \
  --name pgadmin \
  dpage/pgadmin4
NB: pgAdmin listen on port 80
NB: local host listens on port 8080
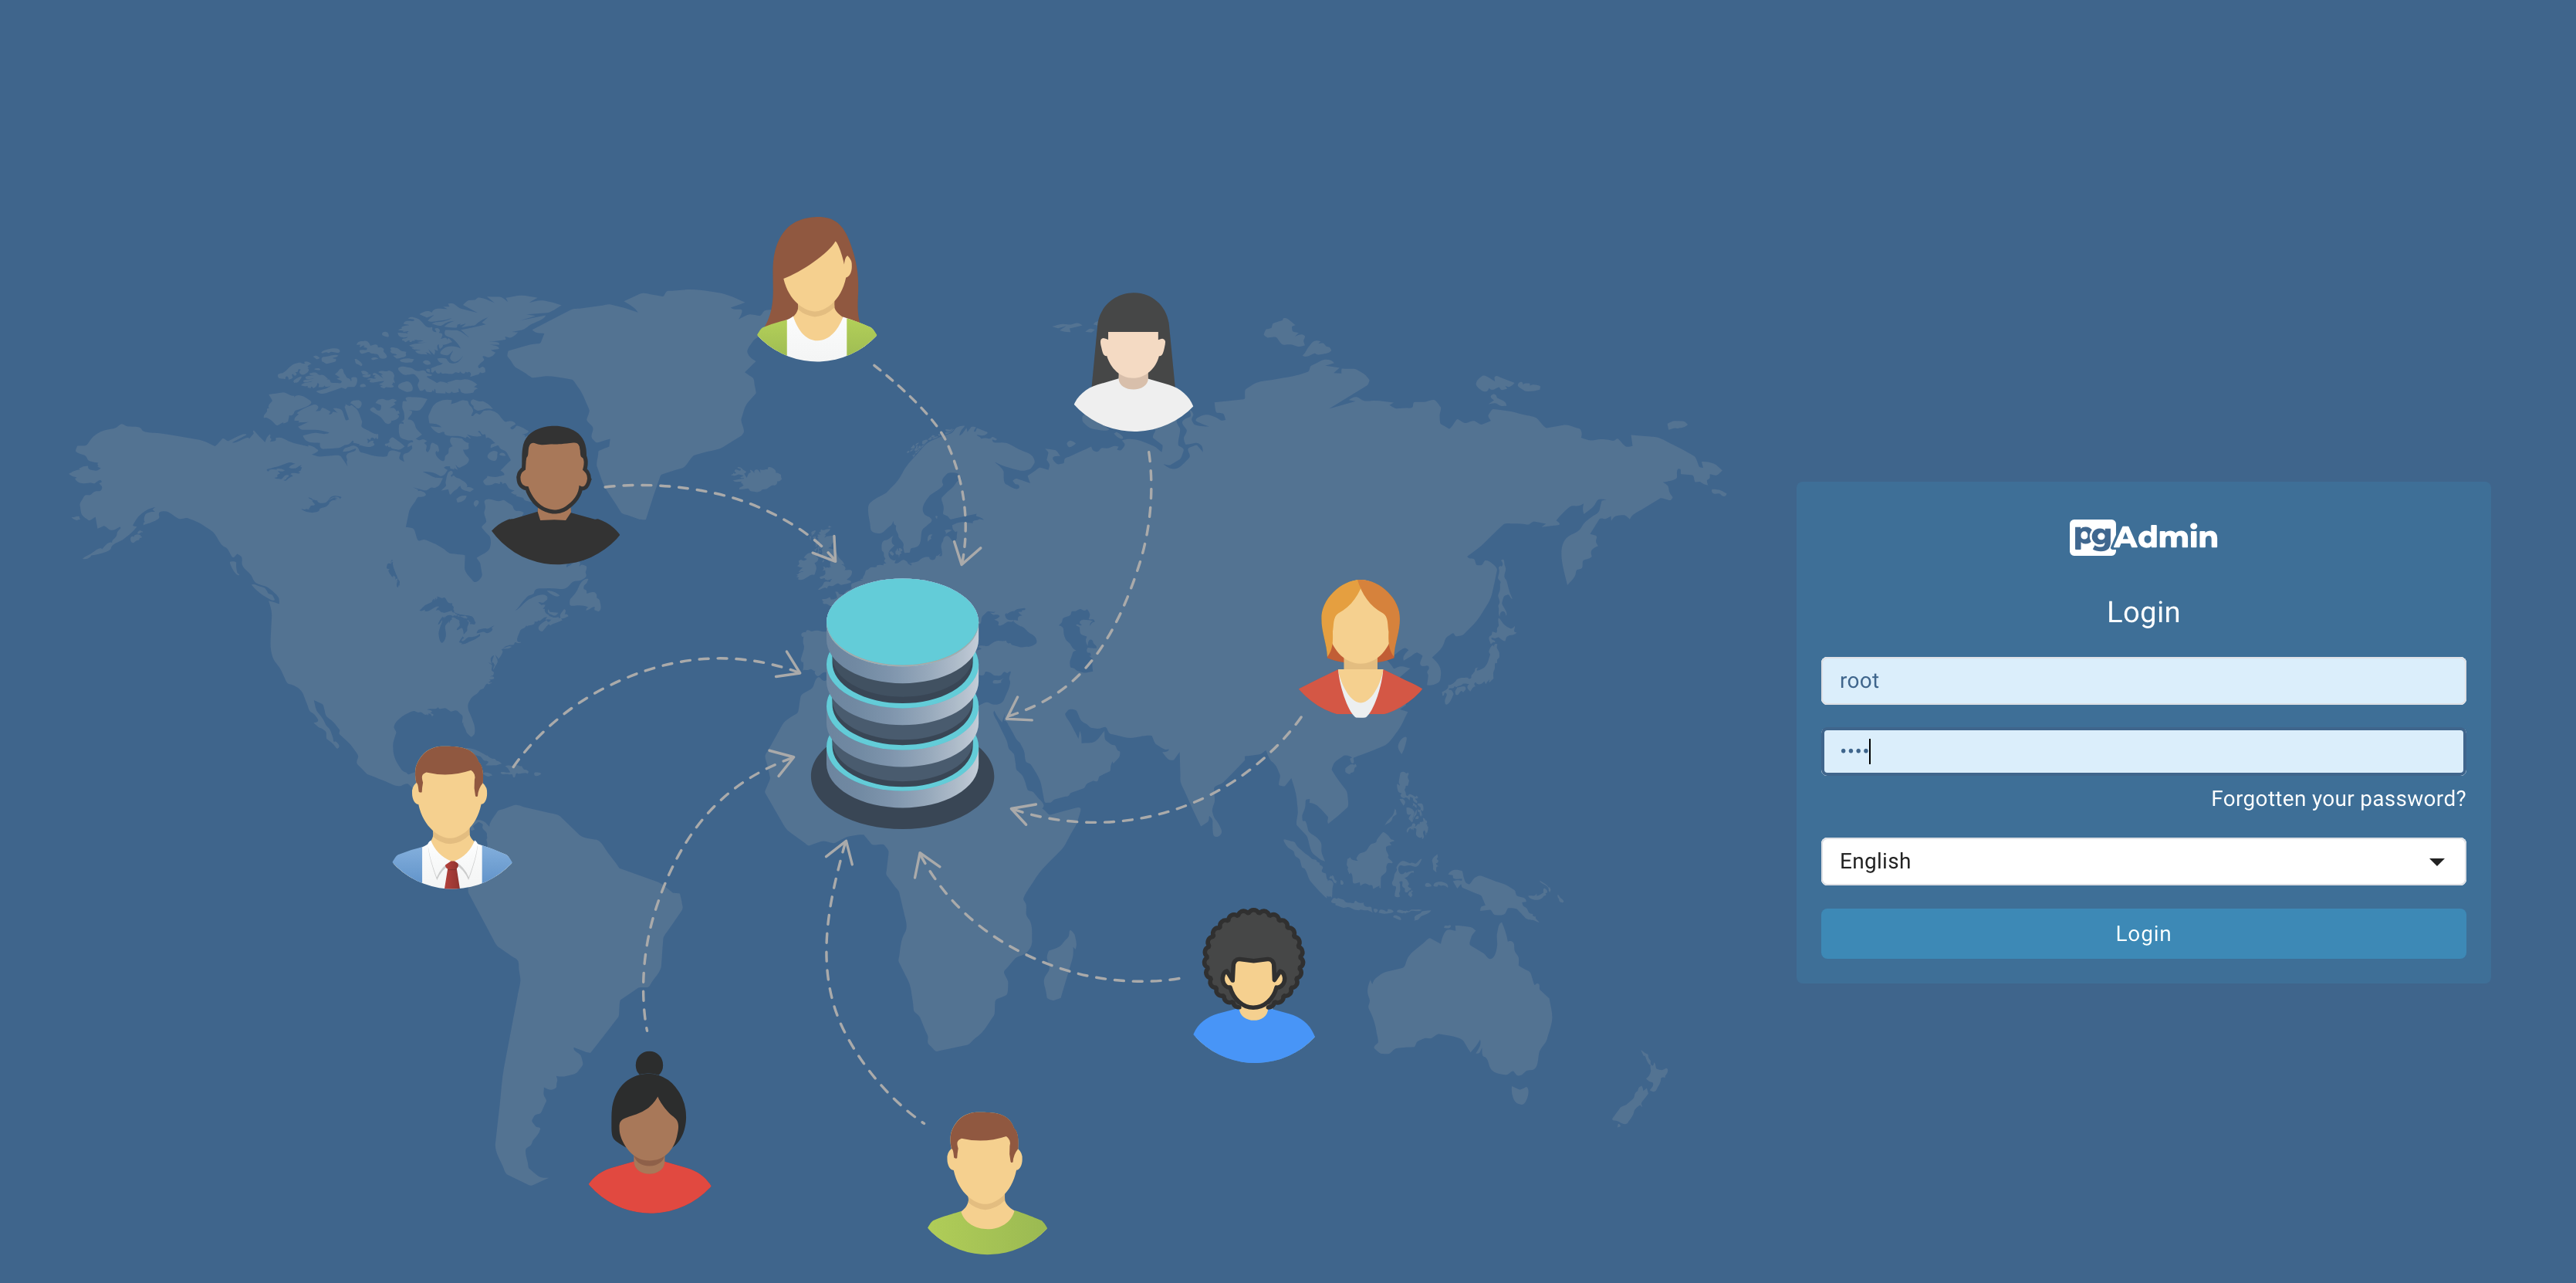
Login to pgAdmin via web browser at:
___
URL: http://localhost:8080/browser/
email: admin@admin.com
password: root
You should now be able to load pgAdmin on a web browser by browsing to localhost:8080 . Use the same email and password you used for running the container to log in.
pgadmin landing page
Click tool -> register -> servers
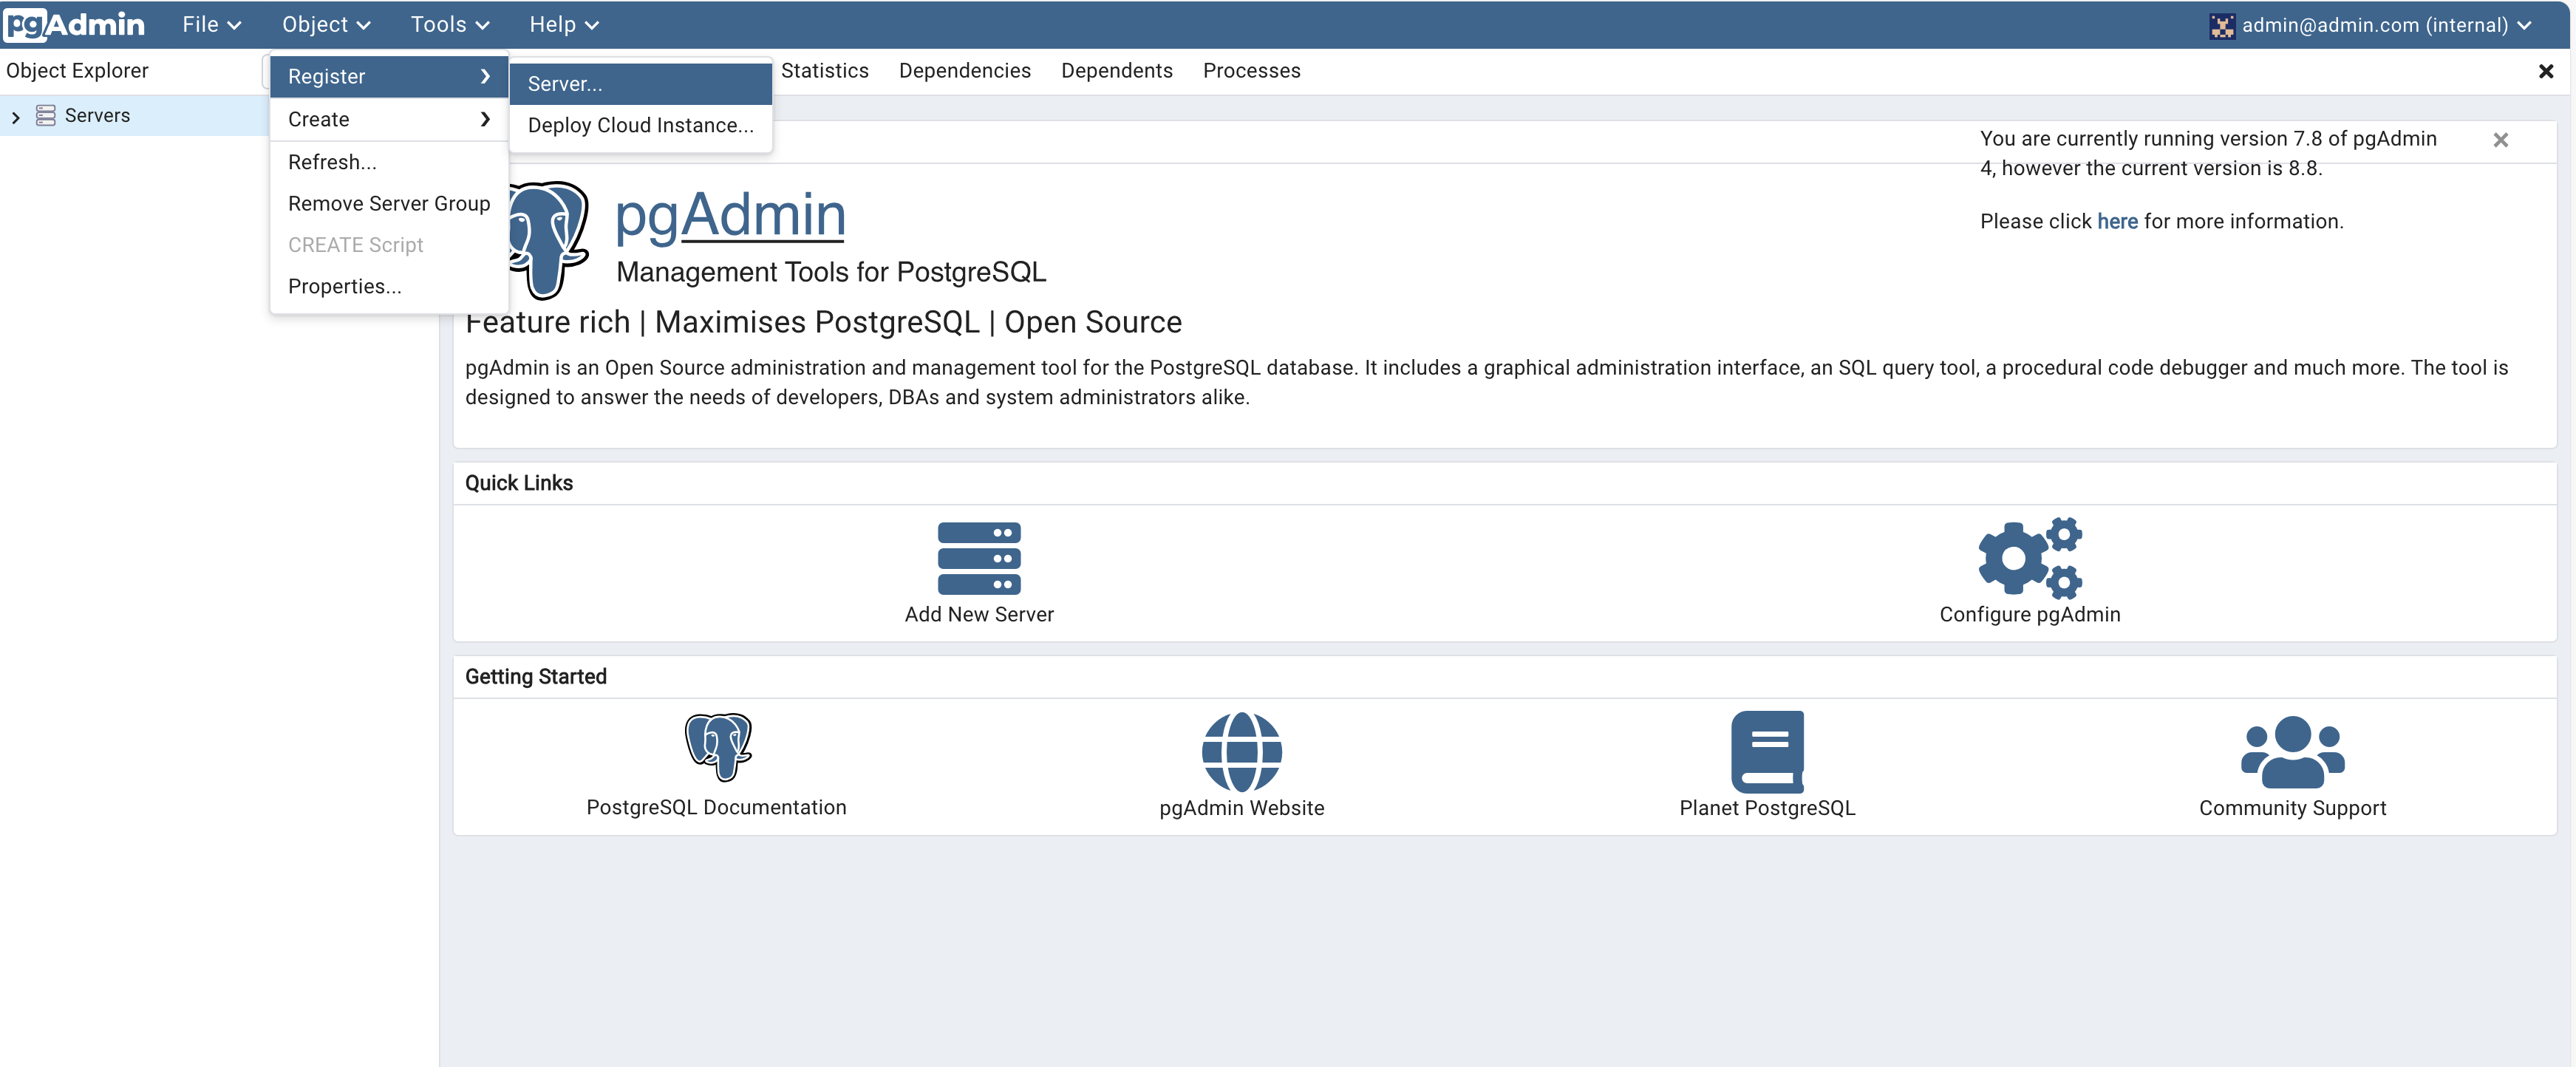
creating database login
Give the Server a name and under Connection add the same host name, user and password you used when running the container.
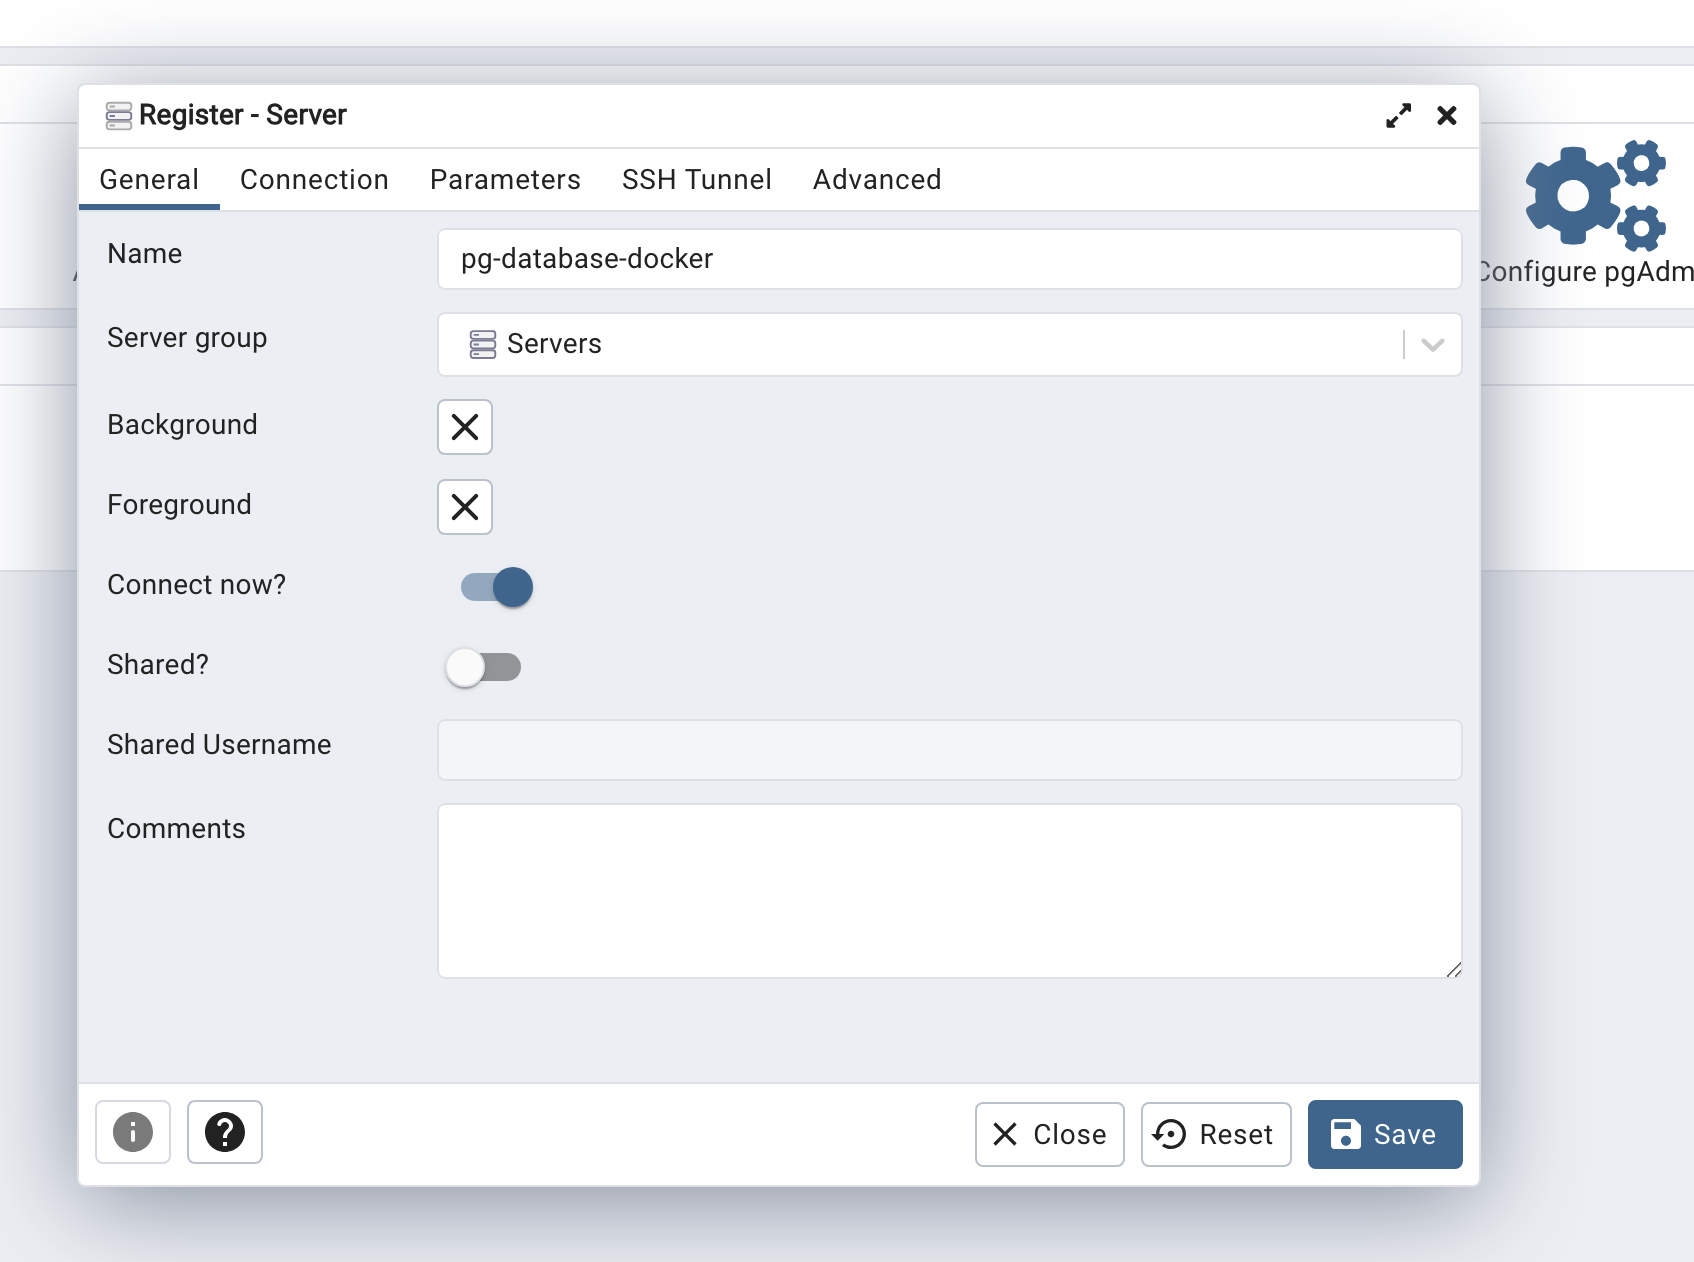
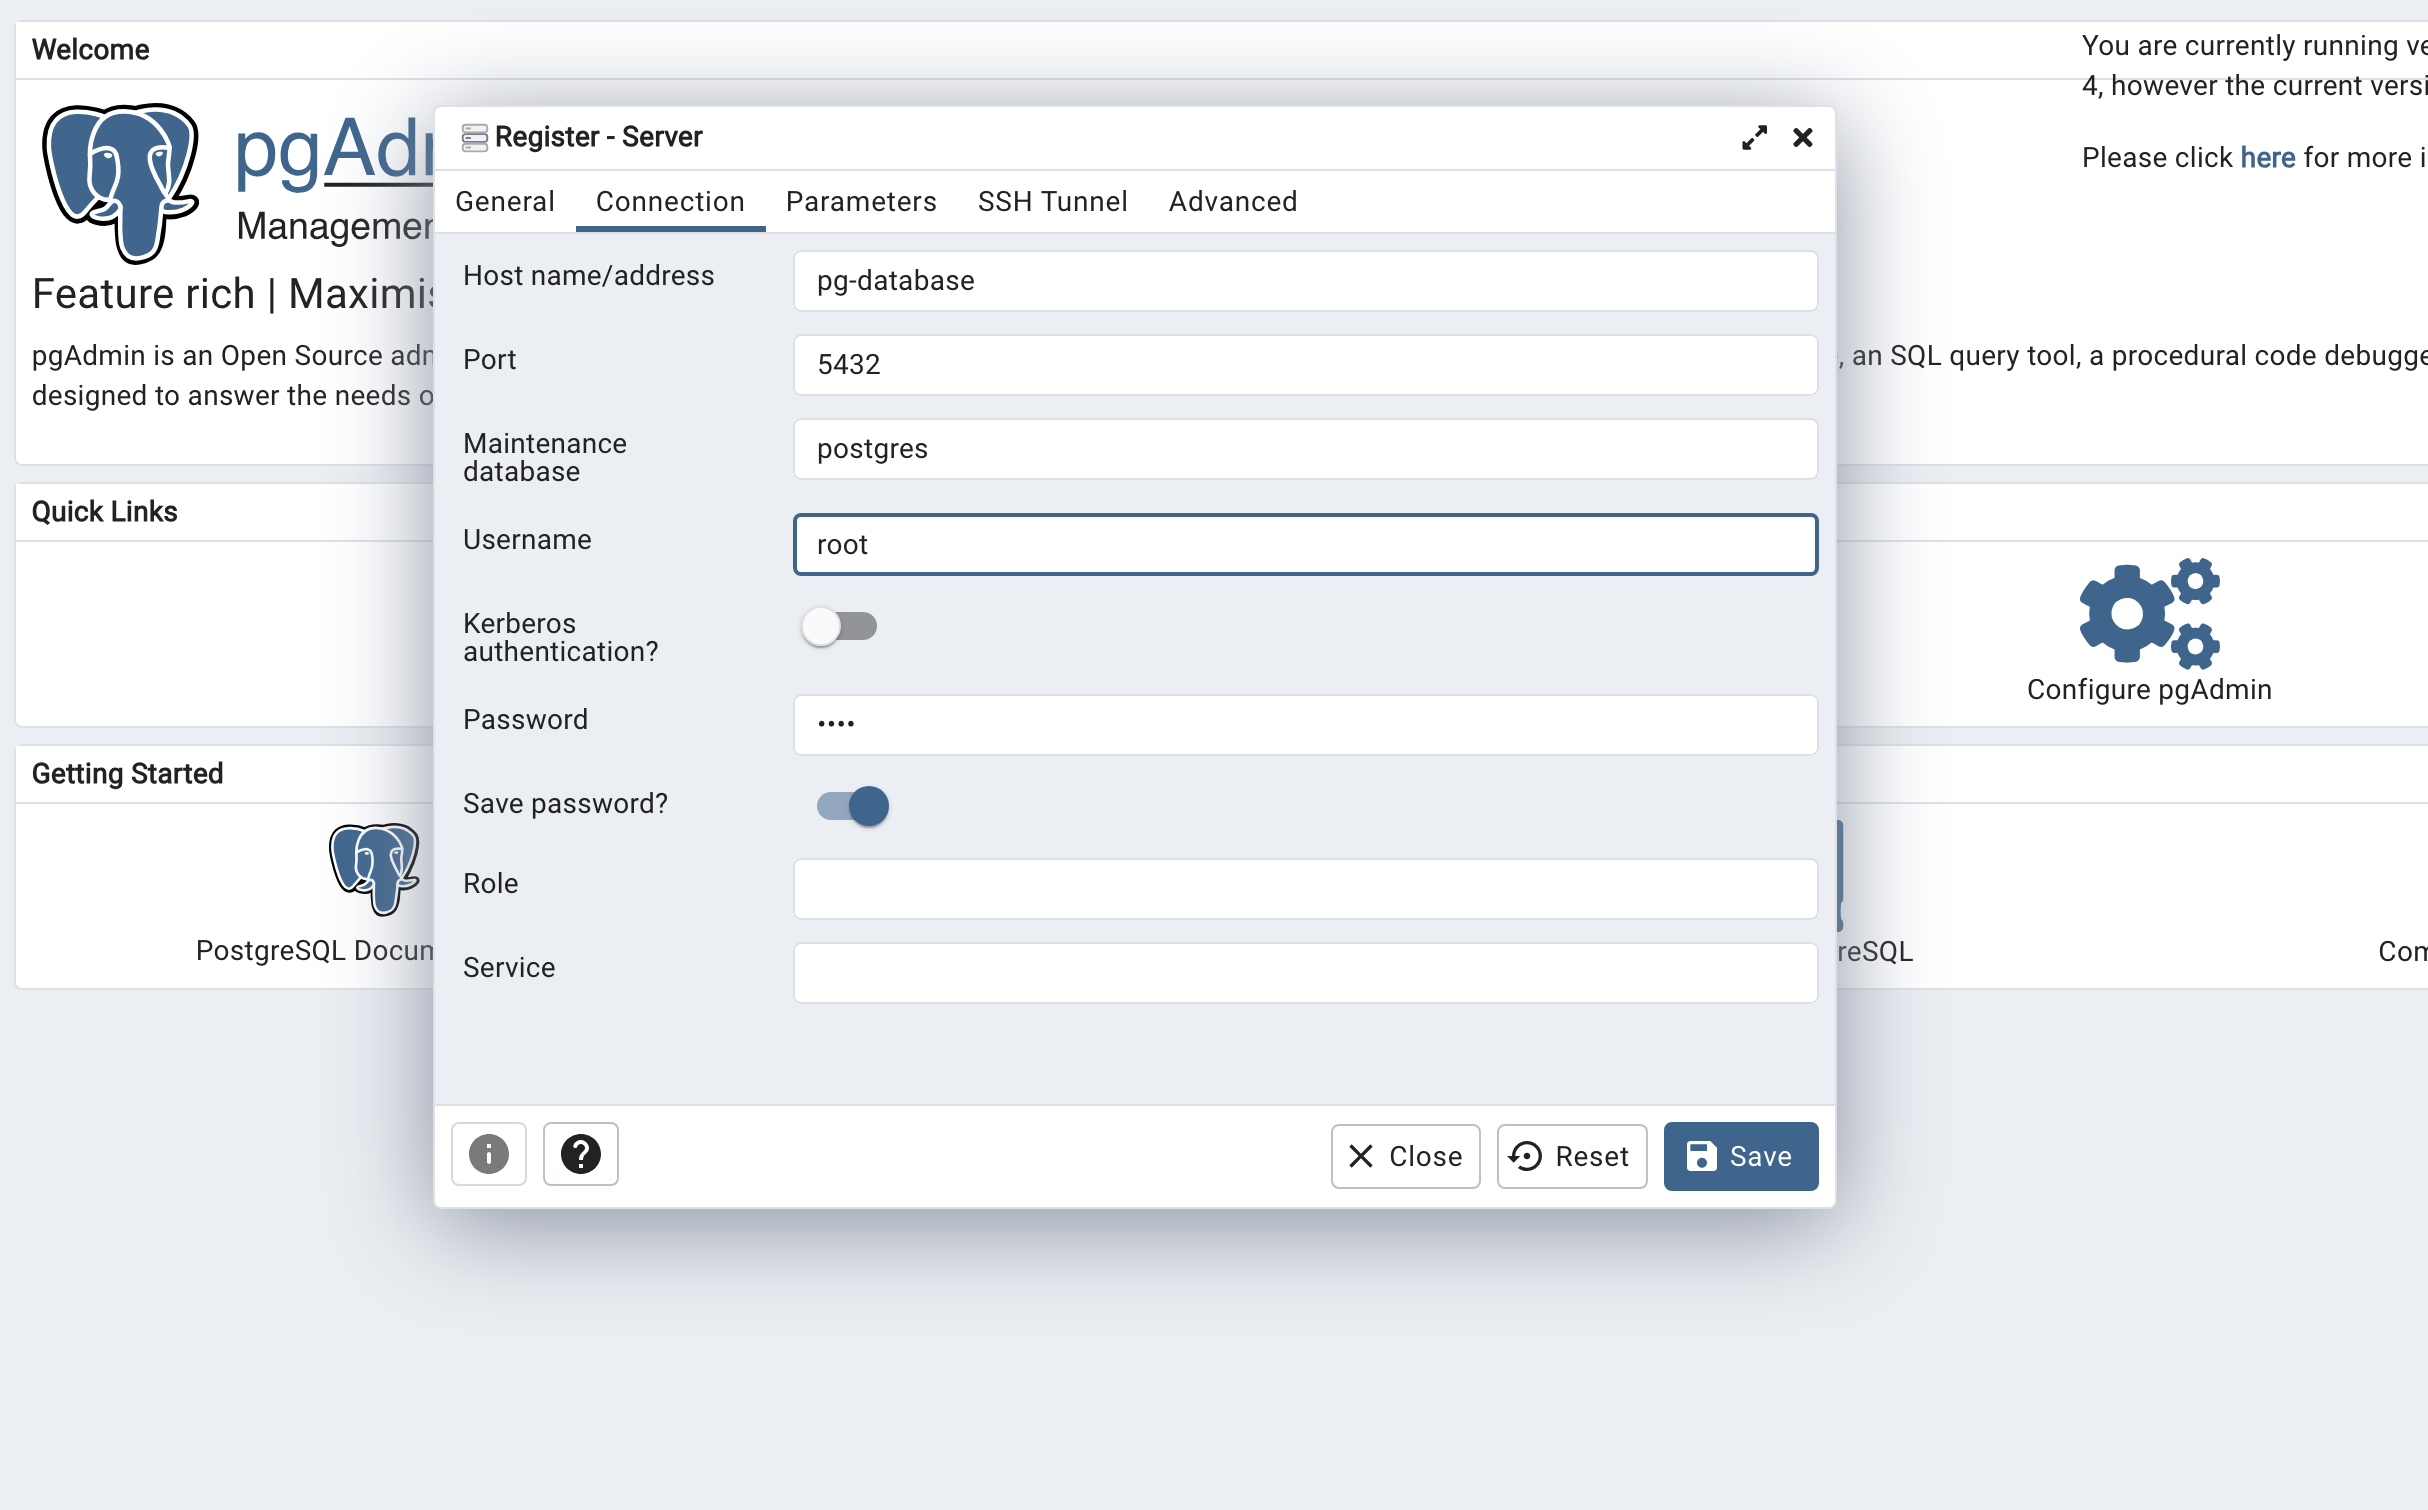
Click on Save. You should now be connected to the database.
We will explore using pgAdmin in later lessons ___
Run the ingestion script
Open the jupyter noteboook and run the cells to execute the codes.
Data successfull read into ny-taxi databse
Dockerize the ingestion script
Convert the ingest_ny_taxi_data_to_postgresql_docker.ipynb Jupyter Notebook
into a Python script called ingest_data.py. In the script, read secrets from
the .env file.
Please note that you should change the hostname to the name of the pg-database.
Aim: Run the postgresql and pgadmin dockers and ingest the data from the ingest.py script: python ingest_data.py
Dockerize the ingestion script with a dockerfile
Export and test the script
Dockerze the ingestion script with a dockerfile video
We will now export the Jupyter notebook file to a regular Python script and use Docker to run it.
To export the ipynb file to a py file, use the following command:
jupyter nbconvert --to=script ingest_ny_taxi_data_to_postgresql_docker.ipynb
Clean up the script by removing unnecessary code. Rename it to ingest_data.py
and make the following modifications:
We will create an .env file to pass arguments to the script.
The .env file should contain the following:
POSTGRES_USER=root
POSTGRES_PASSWORD=root
POSTGRES_DB=ny_taxi
HOST=pg-database
PORT=5432
TABLE_NAME=ny_taxi_data
URL=https://s3.amazonaws.com/nyc-tlc/trip+data/yellow_tripdata_2021-01.csv
Modify the engine used to connect to Postgres by passing the parameters and building the URL:
engine = create_engine(f'postgresql://{user}:{password}@{host}:{port}/{db}')
Download the CSV using the provided URL argument.
You can find the completed ingest_data.py script here.
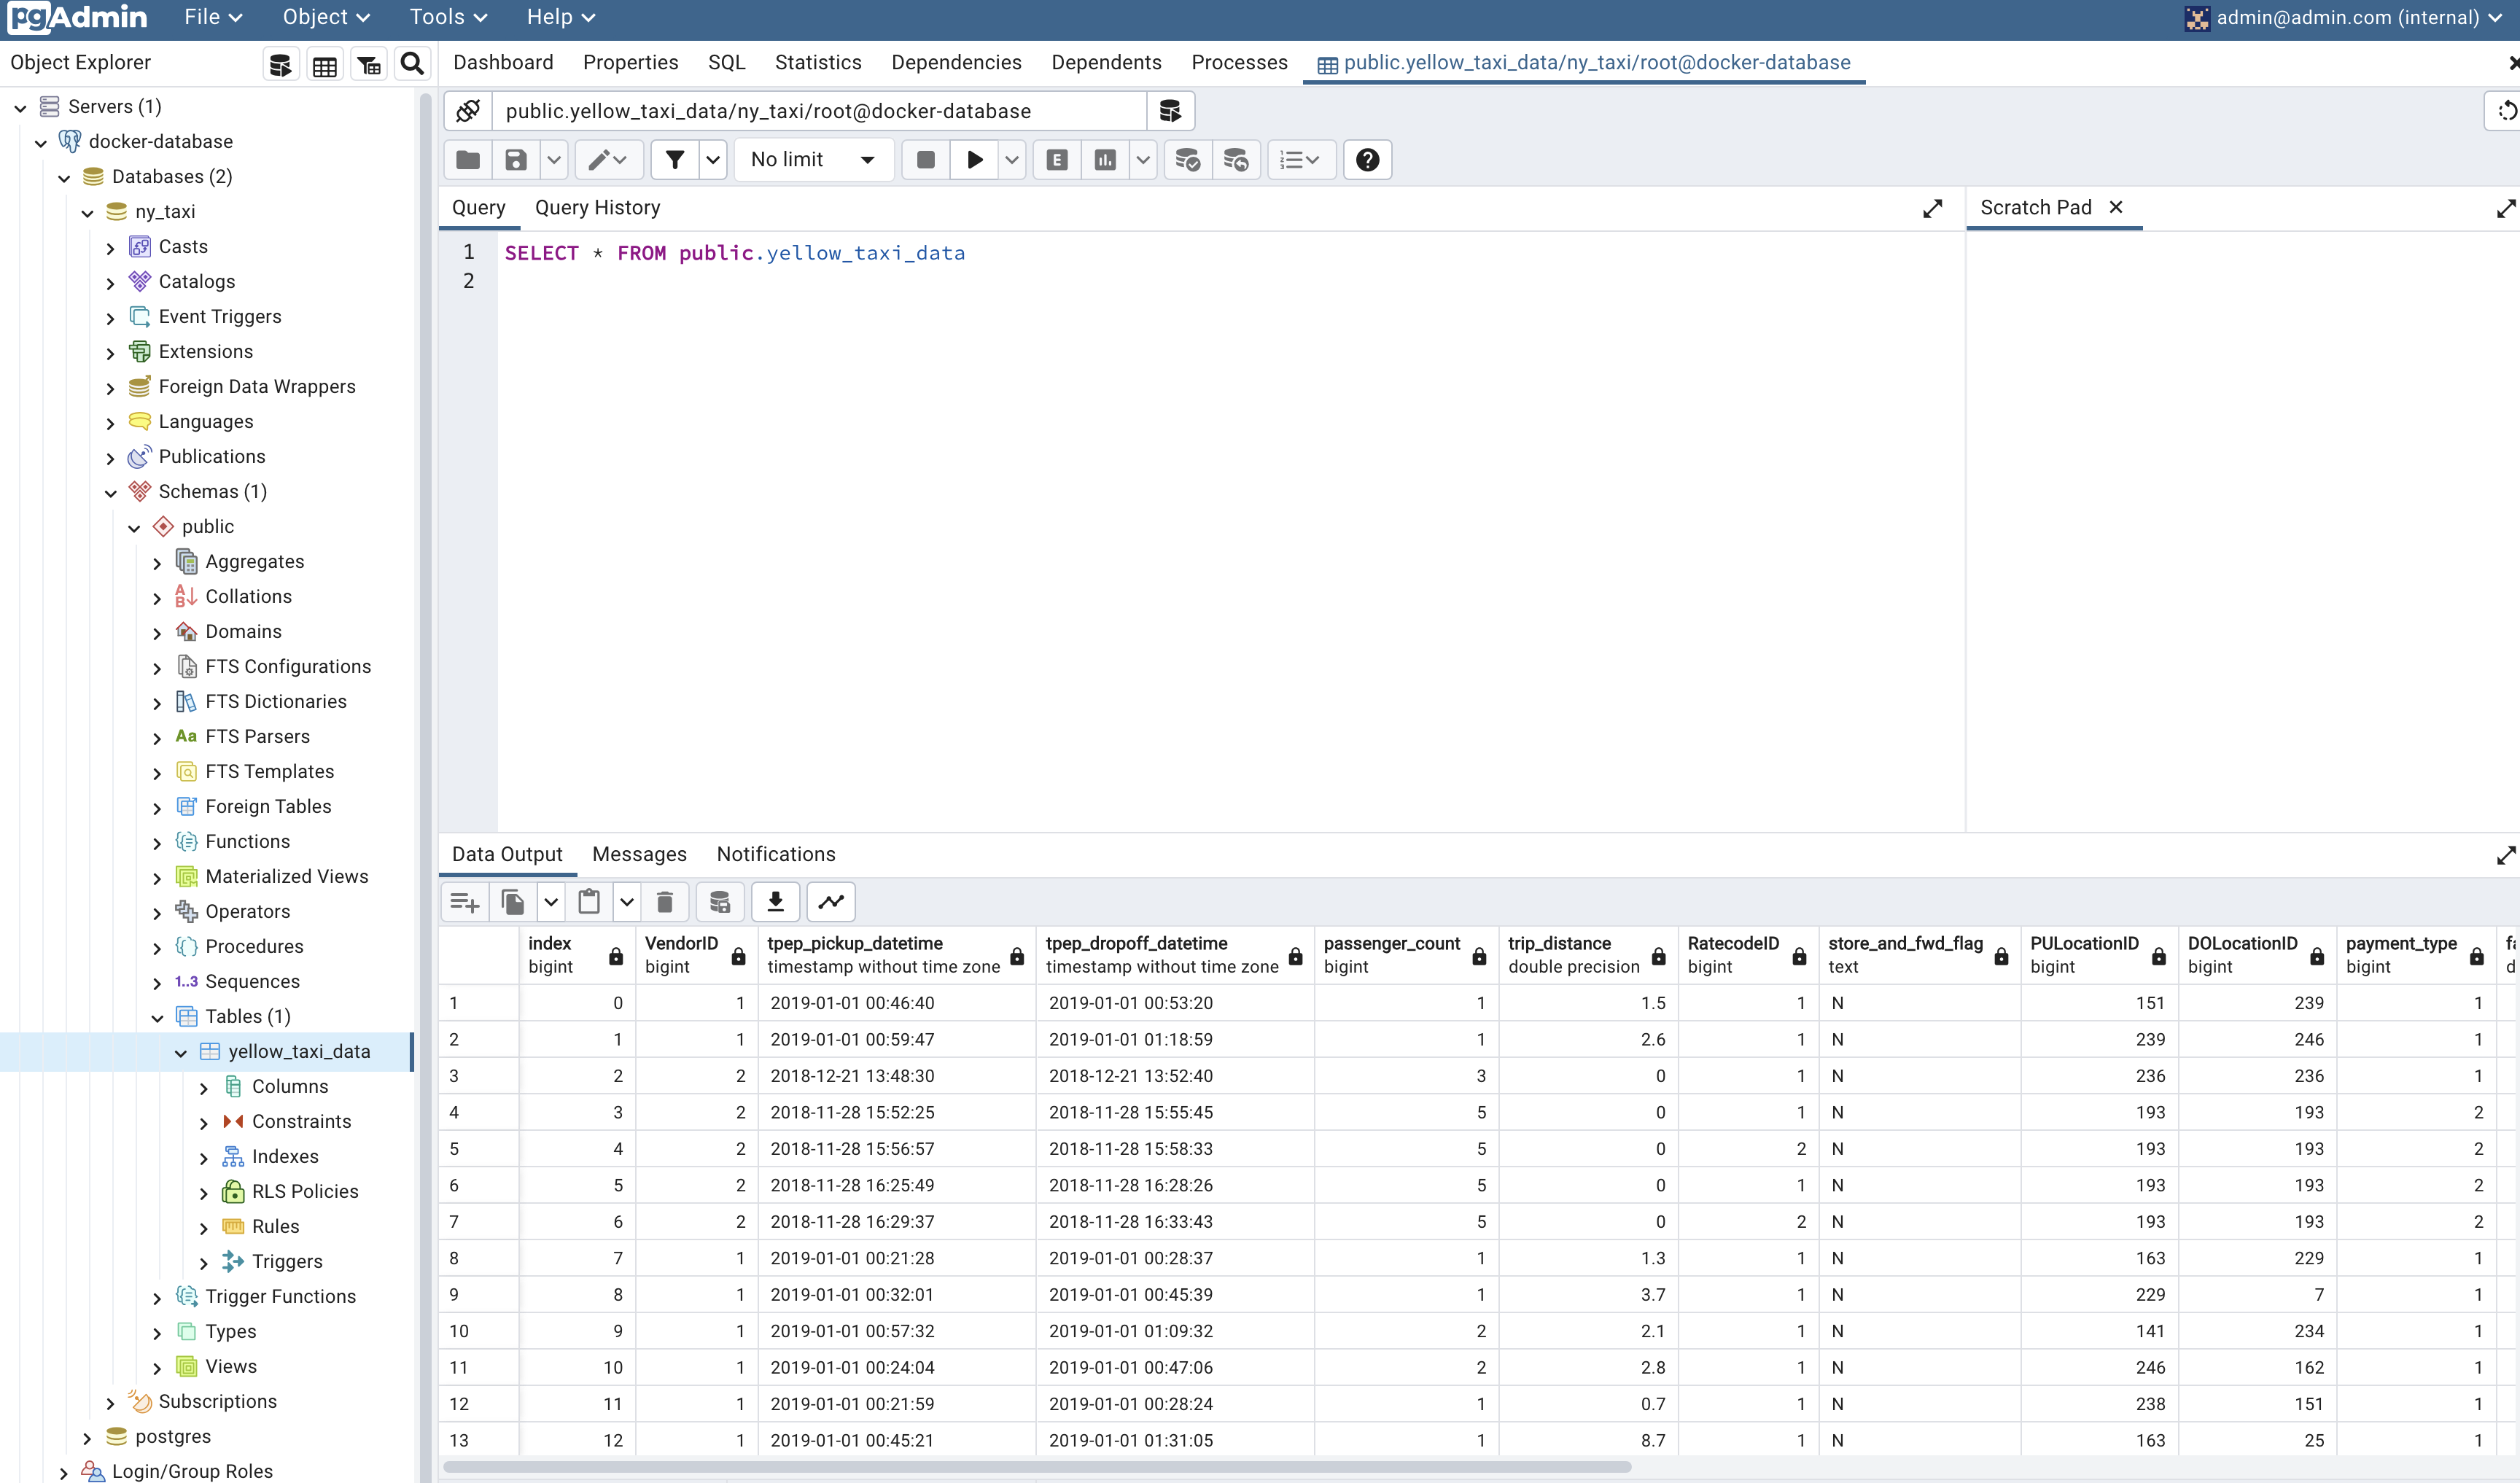
To test the script, we need to drop the table we previously created. In pgAdmin, navigate to Servers > Docker localhost > Databases > ny_taxi > Schemas > public > Tables > yellow_taxi_data. Right-click on yellow_taxi_data and select Query tool. Enter the following command:
DROP TABLE yellow_taxi_data;
Run the script with the following command:
python ingest_data.py
In pgAdmin, refresh the Tables and check that yellow_taxi_trips was created. You can also run a SQL query to check the contents:
SELECT COUNT(1) FROM yellow_taxi_trips;
This query should return 1,369,765 rows.
FROM python:3.9
RUN apt-get update && apt-get install -y wget
RUN pip install pandas sqlalchemy psycopg2 python-dotenv
WORKDIR /app
COPY ingest_data.py ingest_data.py
COPY .env .env
ENTRYPOINT ["python", "ingest_data.py" ]
Dockerize the script
Build the Dockerfile into a docker image
To build the Dockerfile into a docker image called taxi_ingestion:v001, you
can run the following commands:
docker build -t taxi_ingestion:v001 .
This command will build the Dockerfile and tag the resulting image as taxi_ingestion:v001.
Run the docker image
Since taxi_ingestion images uploads data into postgres, postgresql docker must be up and running before running ingestion script
docker network create pg-network
docker run -it \
-e POSTGRES_USER="root" \
-e POSTGRES_PASSWORD="root" \
-e POSTGRES_DB="ny_taxi" \
-v /Users/air/Documents/a_zoom_data_engineer/cli_docker_postgres/ny_taxi_postgres_data:/var/lib/postgresql/data \
-p 5431:5432 \
--network=pg-network\
--name pg-database\
  postgres:13
docker run -it \
-e PGADMIN_DEFAULT_EMAIL="admin@admin.com" \
-e PGADMIN_DEFAULT_PASSWORD="root" \
-p 8080:80 \
--network=pg-network \
--name pgadmin \
dpage/pgadmin4
docker run -t taxi_ingestion.py
Note:
To simulate a server using your local directory and turn it into a website, you can run the following command:
python -m http.server
Note:
If you want to find the default IP address (inet), you can use the following command:
ifconfig | grep "inet"
To access the local directory turned website, you can use the following URL:
Running pgadmin, postgres with Docker-compose
docker-compose allows us to launch multiple containers using a single configuration file, so that we don’t have to run multiple complex docker run commands separately. It simplifies the process by using YAML files. Here’s an example of a docker-compose.yaml file that can be used to run the Postgres and pgAdmin containers. You only need to run this command once to spin up both containers:
1; Create a docker-compose.yaml file with the following content:
version: '3'
services:
  postgres:
    image: postgres:13
    environment:
      - POSTGRES_USER=root
      - POSTGRES_PASSWORD=root
      - POSTGRES_DB=ny_taxi
    volumes:
      - /Users/air/Documents/a_zoom_data_engineer/cli_docker_postgres/ny_taxi_postgres_data:/var/lib/postgresql/data
    ports:
      - 5431:5432
    networks:
      - pg-network

  pgadmin:
    image: dpage/pgadmin4
    environment:
      - PGADMIN_DEFAULT_EMAIL=admin@admin.com
      - PGADMIN_DEFAULT_PASSWORD=root
    ports:
      - 8080:80
We don’t have to specify a network because docker-compose takes care of it: every single container (or “service”, as the file states) will run withing the same network and will be able to find each other according to their names (pgdatabase and pgadmin in this example). Hence it is important to identify the network after the services is up and running. with:
docker network ls
In this case, the network is chapter_3_mynetwork
The docker-compose.yaml file contains two services: postgres and pgadmin.
The postgres service runs the Postgres container with the specified environment
variables, volumes, ports, and network. The pgadmin service runs the pgAdmin
container with the specified environment variables, ports, and network.
All other details from the docker run commands (environment variables, volumes, and ports) are mentioned accordingly in the file following YAML syntax
2; To run docker-compose.yaml
docker-compose up
3; To down the docker
docker-compose down
we repeat the build process again, but you can skip it.
Build the dockerfile containing file ingestion script ingest_data.py
into image, tag it as taxi_ingestion_docker_compose:v001
docker build -t taxi_ingestion_docker_compose:v001 .
Run the just created image docker: taxi_ingestion_docker_compose:v001
in the network called chapter_3_mynetwork
docker run -it --network chapter_3_mynetwork taxi_ingestion_docker_compose:v001 .
Note: To make pgAdmin configuration persistent, create a folder data_pgadmin.
And change its permission via
sudo chown 5050:5050 data_pgadmin
And mount it to the image folder /var/lib/pgadmin with:
services:
  pgadmin:
    image: dpage/pgadmin4
    volumes:
      - ./data_pgadmin:/var/lib/pgadmin
    ...
Note: to inspect the network
docker network inspect chapter_3_mynetwork
Chapter four: Provision GCP resources with terraform
Provision GCP resources with terraform video
Terraform is a powerful infrastructure as code tool that enables us to provision and manage infrastructure resources using code. By treating infrastructure as code, we can leverage version control and automation, making it easier to manage and scale our infrastructure. With Terraform, we can bypass the need for manual configuration through cloud vendor GUIs, allowing for more efficient and reproducible infrastructure management.
During this course we used Google Cloud Platform (GCP) as our cloud services provider.
GCP revolves around the concept of projects. By creating a project, you gain access to a wide range of GCP resources and services through the project dashboard.
In order to proceed, we will create both a project and a service account. The service account functions similarly to a user account, but is specifically designed for applications and workloads. With a service account, you have the ability to authorize and restrict the resources that are accessible to your applications. Additionally, we will download the authentication keys for the service account to our local machine.
To provision GCP resources with Terraform, we need to install:
- Python 3 (e.g. installed with Anaconda)
- Google Cloud SDK
- Docker with docker-compose
- Terraform
Create GCP project
- Create an account on GCP. You should receive $300 in credit when signing up on GCP for the first time with an account.
- Setup a new project and write down the Project ID.
- From the GCP Dashboard, click on the drop down menu next to the Google Cloud Platform title to show the project list and click on New project.
- Give the project a name. You can use the autogenerated Project ID (this ID must be unique to all of GCP, not just your account). Leave the organization as No organization. Click on Create.
- Back on the dashboard, make sure that your project is selected. Click on the previous drop down menu to select it otherwise.
- Enable billing for the project.
- Click on the three horizontal lines in the top left corner of the GCP
- Click on Billing and then click on Manage billing accounts.
- Click on Add billing account and follow the instructions to set up billing.
- Once billing is set up, go back to the dashboard and make sure that your project is selected.
Create a service account & roles for the project
- Setup a service account for this project and download the JSON authentication
key files.
- Go to the GCP Dashboard and make sure that your project is selected.
- IAM & Admin > Service accounts > Create service account
- Provide a service account name. We will use dtc-de-user. Leave all other fields with the default values. Click on Create and continue.
- Grant the Viewer role (Basic > Viewer) to the service account and click on
Continue - There is no need to grant users access to this service account at the moment.
Click on
Done. - With the service account created, click on the 3 dots below Actions and select
Manage keys. - Add key > Create new key. Select JSON and click Create. The files will be downloaded to your computer. Save them to a folder and write down the path.
- Grant viewer role to the service account
- Generate & download key .json file as json format
-
Download the GCP SDK for local setup. Follow the instructions to install and connect to your account and project.
- Install google cloud sdk with:
brew install --cask google-cloud-sdk
- Check the version of the SDK with:
gcloud -v
-
You can use the
gcloudcommand to authenticate and set up your project.gcloud auth login gcloud config set project <project-id>- You can also use the
gsutilcommand to interact with Google Cloud Storage.
gsutil ls - You can also use the
-
Set the environment variable to point to the auth keys.
- The environment variable name is
GOOGLE_APPLICATION_CREDENTIALS. - The value for the variable is the path to the json authentication file you downloaded previously.
- The environment variable name is
export GOOGLE_APPLICATION_CREDENTIALS="<path/to/your/service-account-authkeys>.json"
-
- Refresh token/session, and verify authentication
gcloud auth application-default login
-
- Verify authentication
gcloud auth list
GCP should be listed as the active account. and ready to use.
Setup for Access
In the following chapters we will setup a Data Lake on Google Cloud Storage and a Data Warehouse in BigQuery. We will explore these concepts in future lessons but a Data Lake is where we would usually store data and a Data Warehouse provides a more structured way to access this data.
We need to setup access first by assigning the Storage Admin,
Storage Object Admin, BigQuery Admin and Viewer IAM roles to
the Service Account, and then enable the iam and iamcredentials APIs
for our project.
- For Service account:
- IAM & Admin > Service accounts
- Click on the service account you created and edit the permissions by clicking on the pencil shaped icon on the left.
- Click on Add another role and add the following roles:
- Storage Admin : for creating and managing buckets
- Storage Object Admin : for creating and managing objects in buckets
- BigQuery Admin : for creating and managing datasets and tables in BigQuery
- Enable these APIs for your project (these are needed so that Terraform can interact with GCP):
Terraform basics
The files for teraform are here:
Terraform is a tool for building, changing, and versioning infrastructure safely and efficiently. Terraform can manage existing and popular service providers as well as custom in-house solutions.
Terraform is an open-source infrastructure as code software tool created by HashiCorp. Users define and provide data center infrastructure using a declarative configuration language known as HashiCorp Configuration Language (HCL), or optionally JSON.
Terraform manages external resources such as public cloud infrastructure, private cloud infrastructure, network appliances, software as a service, and platform as a service with a concept known as providers. Terraform supports a number of cloud infrastructure providers such as Amazon Web Services, IBM Cloud (formerly Bluemix), Google Cloud Platform, Linode, Microsoft Azure, Oracle Cloud Infrastructure, and VMware vSphere as well as OpenStack.
The set of files used to describe infrastructure in Terraform is known as a
Terraform configuration. Terraform configuration files end up in .tf for
files written in Terraform language or tf.json for JSON files.
A Terraform configuration must be in its own working directory; you cannot
have 2 or more separate configurations in the same folder.
Here’s a basic main.tf file written in Terraform language with all of the necesary info to describe basic infrastructure:
terraform {
  required_providers {
    google = {
      source = "hashicorp/google"
      version = "3.5.0"
    }
  }
}

provider "google" {
  credentials = file("<NAME>.json")

  project = "<PROJECT_ID>"
  region  = "us-central1"
  zone    = "us-central1-c"
}

resource "google_compute_network" "vpc_network" {
  name = "terraform-network"
}
- Terraform divides information into blocks, which are defined within
braces
({}), similar to Java or C++. However, unlike these languages, statements are not required to end with a semicolon;but use linebreaks instead. - By convention, arguments with single-line values in the same nesting leve
have their equal signs
(=)aligned for easier reading. - There are 3 main blocks:
terraform,providerandresource. There must only be a single terraform block but there may be multiple provider and resource blocks. - The
terraformblock contains settings:- The required_providers sub-block specifies the providers required by the
configuration. In this example there’s only a single provider which we’ve
called
google.- A provider is a plugin that Terraform uses to create and manage resources.
- Each provider needs a
sourcein order to install the right plugin. By default the Hashicorp repository is used, in a similar way to Docker images.hashicorp/googleis short forregistry.terraform.io/hashicorp/google.
- Optionally, a provider can have an enforced
version. If this is not specified the latest version will be used by default, which could introduce breaking changes in some rare cases.
- The required_providers sub-block specifies the providers required by the
configuration. In this example there’s only a single provider which we’ve
called
We’ll see other settings to use in this block later.
- The
providerblock configures a specific provider. Since we only have a single provider, there’s only a singleproviderblock for the google provider.- The contents of a provider block are provider-specific. The contents in this example are meant for GCP but may be different for AWS or Azure.
- Some of the variables seen in this example, such as credentials or zone, can be provided by other means which we’ll cover later.
- The
resourceblocks define the actual components of our infrastructure.- In this example we have a single resource.
- Resource blocks have 2 strings before the block: the resource type and the
resource name. Together they create the resource ID in the shape of
type.name. - About resource types:
- The first prefix of the resource type maps to the name of the provider.
For example, the resource type
google_compute_networkhas the prefixgoogleand thus maps to the providergoogle. - The resource types are defined in the Terraform documentation and refer
to resources that cloud providers offer. In our example
google_compute_networkrefers to GCP’s Virtual Private Cloud service. - Resource names are the internal names that we use in our Terraform configurations to refer to each resource and have no impact on the actual infrastructure.
- The first prefix of the resource type maps to the name of the provider.
For example, the resource type
- The contents of a resource block are specific to the resource type. Check the Terraform docs to see a list of resource types by provider.
- In this example, the
google_compute_networkresource type has a single mandatory argument calledname, which is the name that the resource will have within GCP’s infrastructure. - Do not confuse the resource name with the
nameargument!
- Besides these 3 blocks, there are additional available blocks:
variable "region" {
    description = "Region for GCP resources. Choose as per your location: https://cloud.google.com/about/locations"
    default = "europe-west6"
    type = string
}
- Description:
- An input variable block starts with the type variable followed by a name of our choosing.
- The block may contain a number of fields. In this example we use the fields description, type and default.
- description contains a simple description for documentation purposes.
- type specifies the accepted value types for the variable
- If the default field is defined, the variable becomes optional because a default value is already provided by this field. Otherwise, a value must be provided when running the Terraform configuration.
- For additional fields, check the Terraform docs.
-
Variables must be accessed with the keyword
var.and then the name of the variable. - In our
main.tffile above, we could access this variable inside thegoogleprovider block with this line:
region = var.region
- Local values block types behave more like constants.
- They are defined with the
localskeyword. - They can be used to define values that are used multiple times in the configuration.
- They can be accessed with the keyword
local.and then the name of the local value.
- They are defined with the
locals{
    region  = "us-central1"
    zone    = "us-central1-c"
}
Use terraform to provision GCP reseources
The needed terreform files are:
main.tfvariables.tf- Optional:
resources.tf,output.tf .tfstate
help
terraform: configure basic Terraform settings to provision your infrastructurerequired_version: minimum Terraform version to apply to your configurationbackend: stores Terraform’s “state” snapshots, to map real-world resources to your configuration.local: stores state file locally asterraform.tfstaterequired_providers: specifies the providers required by the current moduleprovider:- adds a set of resource types and/or data sources that Terraform can manage
- The Terraform Registry is the main directory of publicly available providers from most major infrastructure platforms.
resource:- blocks to define components of your infrastructure
- Project modules/resources: google_storage_bucket, google_bigquery_dataset, google_bigquery_table
variable&locals:- runtime arguments and constants
Execution steps
terraform init:- Initializes & configures the backend, installs plugins/providers, & checks out an existing configuration from a version control
terraform plan:- Matches/previews local changes against a remote state, and proposes an Execution Plan.
terraform apply:- Asks for approval to the proposed plan, and applies changes to cloud
terraform destroy- Removes your stack from the Cloud
Extra content
Setting up a development environment in a Google Cloud VM If you cannot set up a local development environment, you may use part of the $300 credits of GCP in creating a Cloud VM and access to it via SSH to set up the environment there: Guide video
Port mapping and networks in Docker
If you’re having issues with Docker and networking (especially if you already have Postgres running locally in your host computer), a Video Guide
->Back: index
->Next: Data Ingestion